For this tutorial in video form, click here
The Process
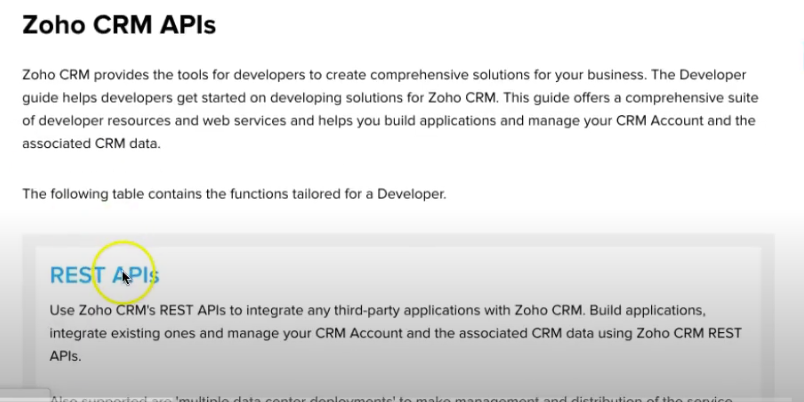
Let’s begin our learning journey by looking at the documentation for the different custom function integration tasks. We’ll do a Google search for “Zoho CRM API”, then click this link:

Next, click REST APIs:
Then go to Record APIs > Get Specific Record data. In the Deluge version on the right, it gives us the syntax:
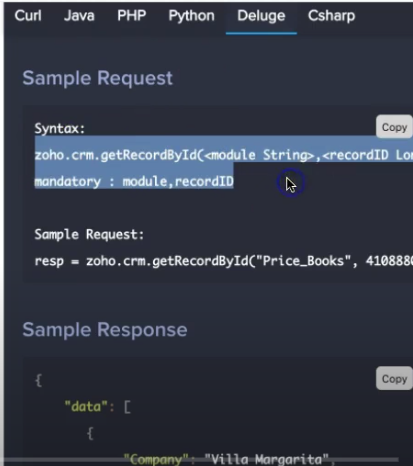
It even gives us the Sample Request and Sample Response. Let’s try that out in our CRM by playing around with a custom function. Let’s go to Setup (the tool button on the top right), then go to DEVELOPER SPACE > Functions. Create a new function. We’ll input the following code:
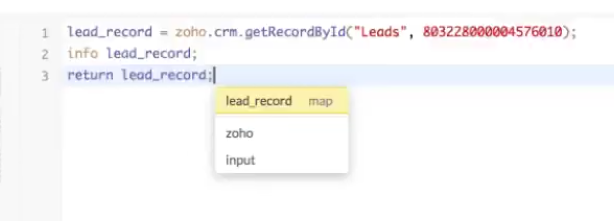
You’ll notice we are getting the ID of a specific lead. This can be found by clicking on the lead of your choice and copying the ID from the end of the URL.

Upon clicking “Save & Execute”, we’ll get some JSON back.

API Names
If we take a look at it, you’ll notice some names that might seem a bit strange.
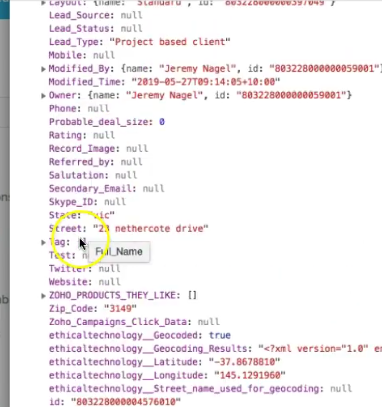
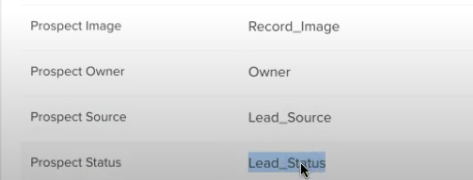
For example, why does it say “Lead_Source” when it’s shown in our CRM as “Prospect Source” (I renamed fields in our CRM)? The answer is simple: the JSON is giving us the API names. If we go to Setup > APIs > API names > Prospects, we can see what the API names are:
You’ll notice that when hovering over some API names, you’ll have the option to edit them. You’re welcome to change the API names, but be careful. If you change it and someone else had written a function already that relied on the old API name, you’re going to break it for them. If you are the only one working on it, go for it. But if you’ve got a team helping you, be pretty careful about changing the API names.
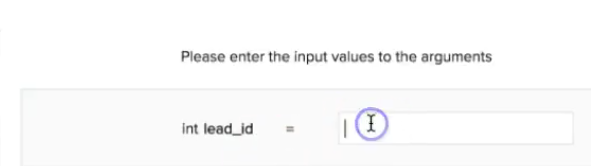
lead_id
Rather than putting a specific lead’s ID into the function, we can simply put “lead_id”.
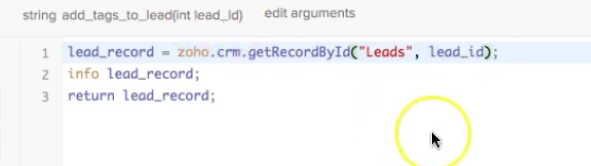
That way, it’ll give us the option to put whatever lead ID we want every time we Save & Execute.