
For this tutorial in video form, click here
In this blog post, we’ll cover how to set up a folder in Zoho WorkDrive, linked to a particular CRM record.
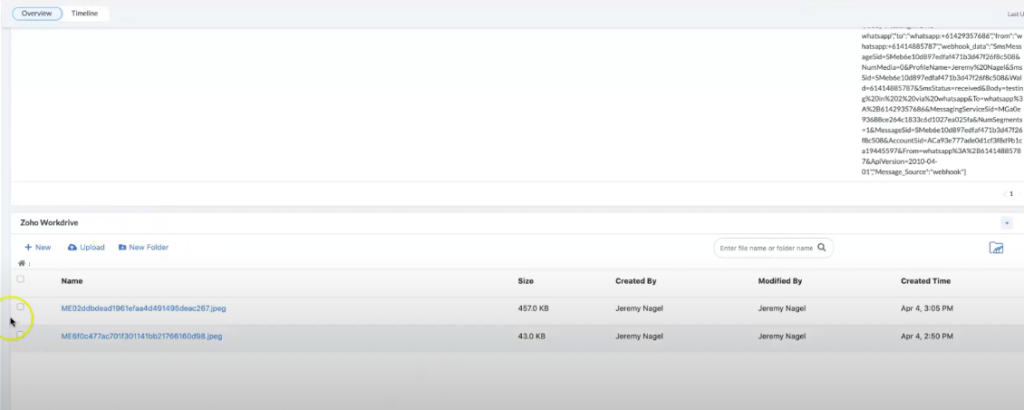
As you can see here, we’ve got the Zoho WorkDrive extension installed. For this particular record, it’s working well; we’ve got some attachments in there.
But if we go to another lead (where we haven’t uploaded any attachments), there’s an issue.
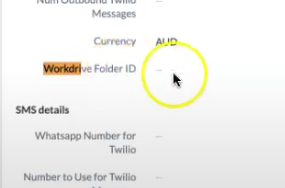
If we want to programmatically add an attachment to this particular record, there isn’t actually a WorkDrive folder ID set.
In order to solve that, we need some Deluge script to create the folder and link it to this particular record. To accomplish this, we run a series of API requests.
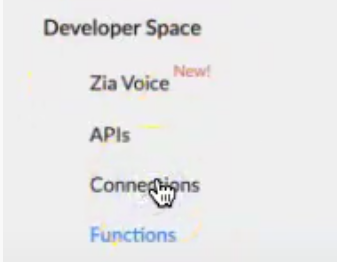
In order to trigger those API requests, we have to set up a connection. In your CRM, go to Setup (the tool button on the top right), then Developer Space > Connections.
You’ll create a Zoho WorkDrive and give it access to all of the permissions required. Click the blue “Add Connection +” button on the top right. Next, click on Zoho OAuth.

Next, name it something appropriate and tick every box that begins with “WorkDrive”.
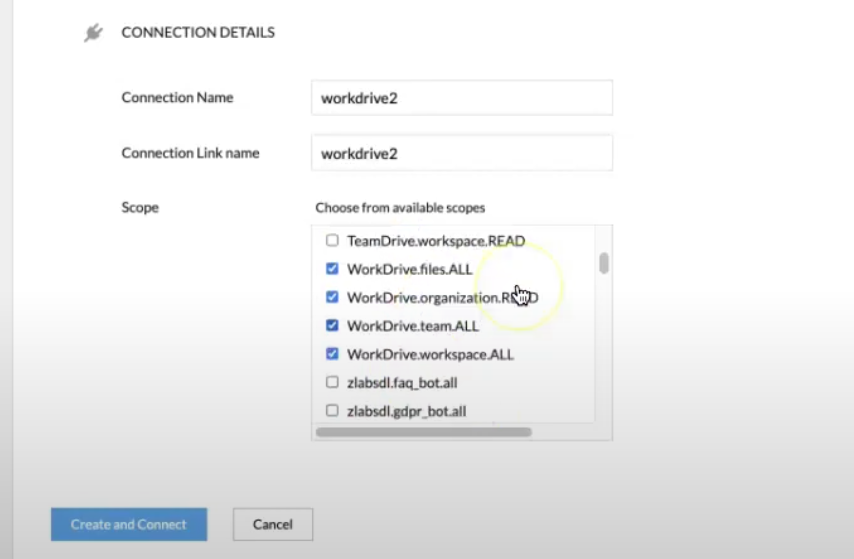
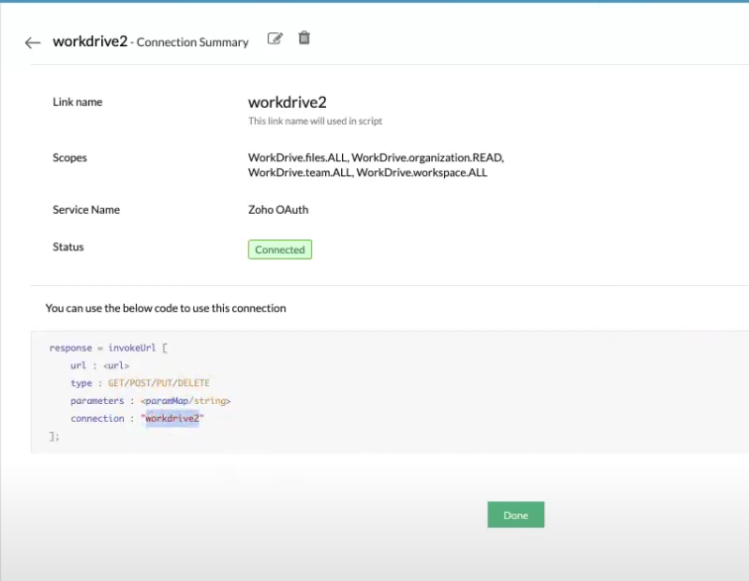
Then click “Create and Connect”. You’ll be direct to a screen labeled “Zoho Workflow”. Click the workdrive button and then “New Account”. After that, it’ll have you accept some conditions. Once you do that, your connection will go online.
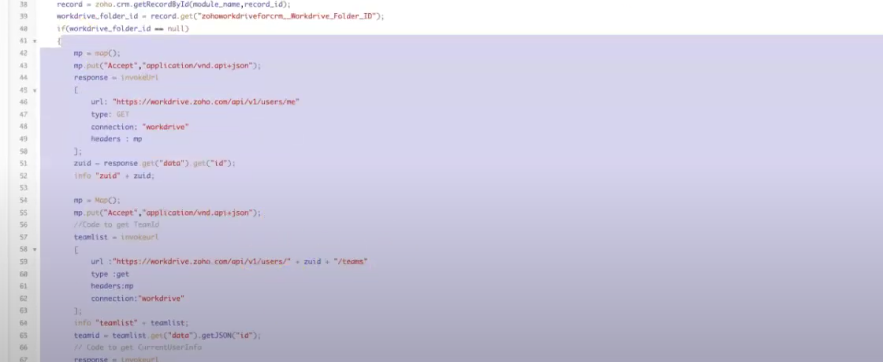
Back in our custom function, we run a whole bunch of Deluge script. First, we’re getting the Zoho user ID, followed by the team that the user is a part of. We can then get the Zoho WorkDrive user ID. After that, we can get the private space ID, which is a section in Zoho WorkDrive for that particular user.
We’re then able to create a folder in that private space.
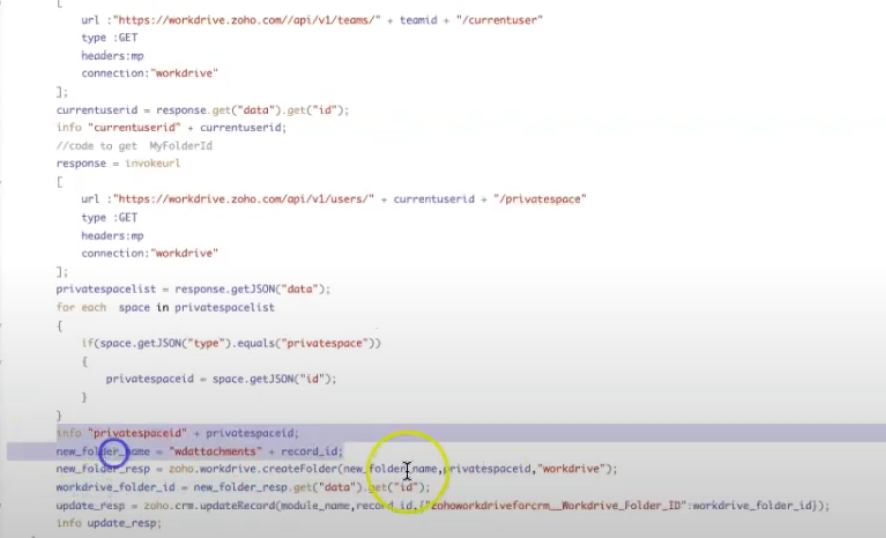
You might be wondering if other users won’t have access to this, since it’s a private space. We had the same question. However, upon testing this, we’ve found that you shouldn’t have any issue.
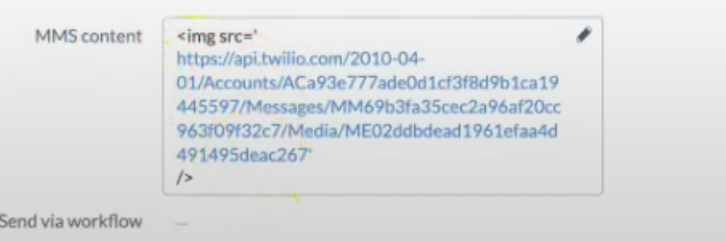
What are we trying to achieve with this code? Essentially, we’re responding to the demand for a WhatsApp or MMS message attachments to be saved long term in our SMS Extension.
Before this, the images attached in a message just sat in Twilio, where they were stored for about 13 months. After that, they were simply deleted. You probably want to have long-term storage of some of them if they’re relatively important.
Using this function, we can copy the URL pointing to an image. We can then store that image in a WorkDrive folder for that particular record.
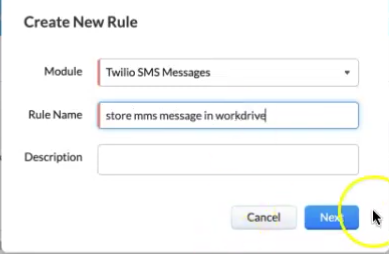
Back in Setup, go to Automation > Workflow Rules. Next, click +Create Rule.
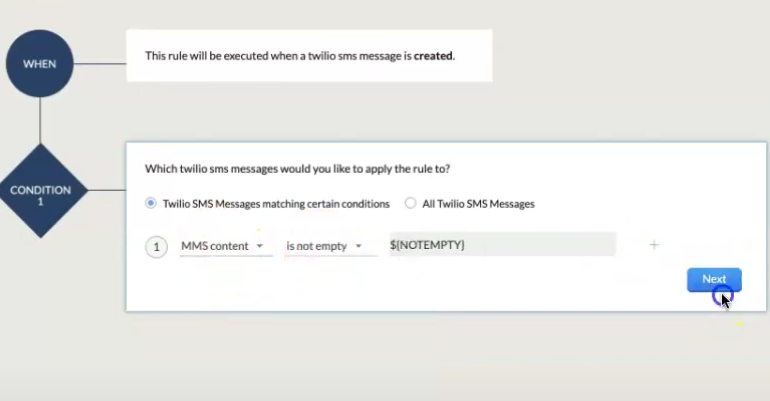
We’re going to trigger a new Workflow on a new MMS message. Fill out the “WHEN” and “CONDITION 1” like so:
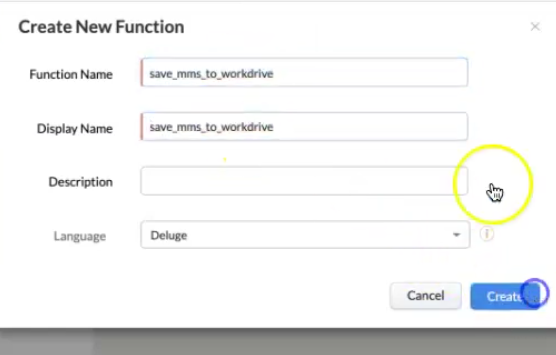
Next, go to Instant Actions and select Functions. Click +New Function. Then click “Write Your Own”. We can name it something like this:
Here is what the code looks like:
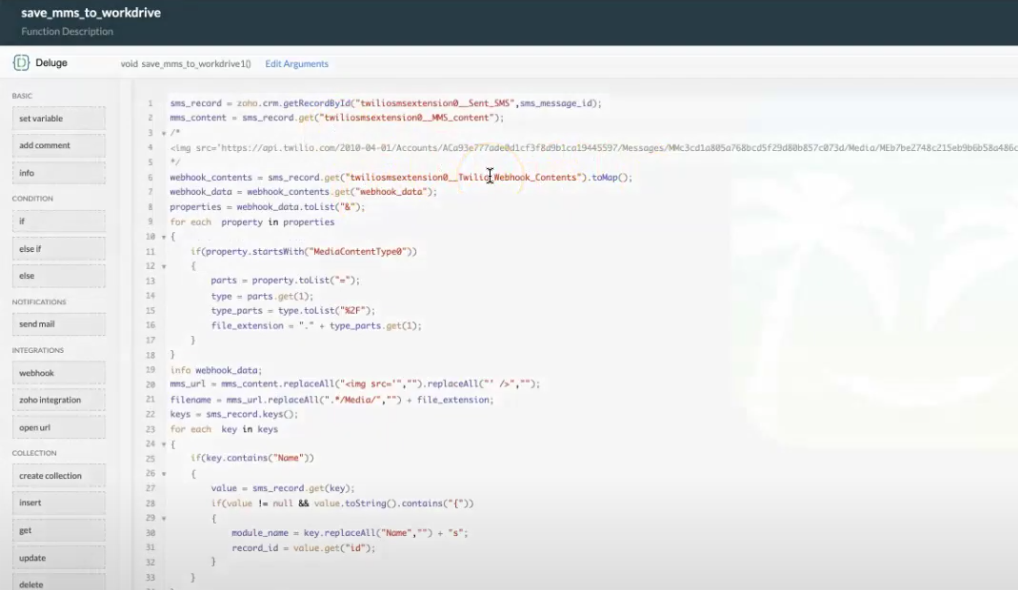
It’s pulling the data out of the Twilio payload. It finds a bunch of stuff. For example, if an image doesn’t have a file extension, we have to dig into some of the metadata to figure out if it’s a JPEG or a PNG. Once we have that, we’ve got a URL which is publicly accessible. And then using that, if we already have a WorkDrive folder ID linked to that record, we can upload it straight in. Otherwise, if we don’t, then we need to create the folder first.
It’s important to note that before we upload it we can’t just pass a URL. We have to use “Invoke URL” first, on that image URL. That’s why it has to be publicly accessible.
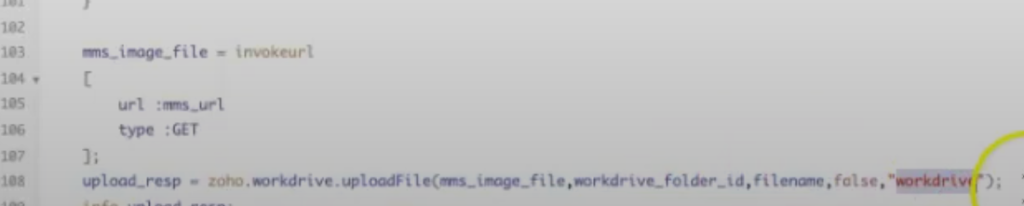
After that, you can use ZohoWorkDive.upload file, pointing to the WorkDrive folder ID and giving it a file name using the connection that you created earlier.
Conclusion
If you don’t have this exact same requirement to work with Twilio attachments, hopefully you can still see how you would use this. Most of the code would be similar. You just have a slightly different approach to how you would get the URL for the file.