
For this tutorial in video form, click here
In this article, we’ll be going over reminders to follow up with leads. Let’s say you have a certain policy that you want to proactively follow up with all of your accounts every 60 days. How would you achieve that? What if you wanted it to be a customized date rather than a regular interval? Luckily enough, you have a few options.
The Process
Inside the Feeds module, you can see the accounts that haven’t been touched in a while.
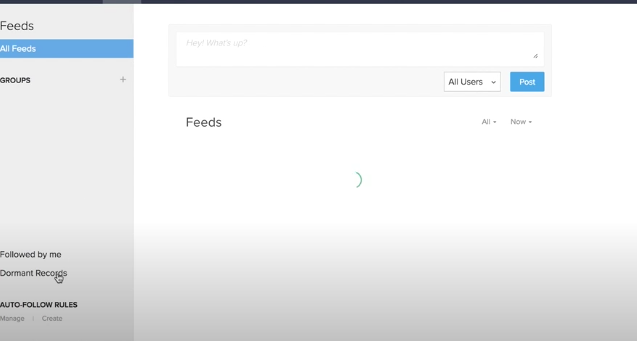
Head over to dormant records on the bottom left.
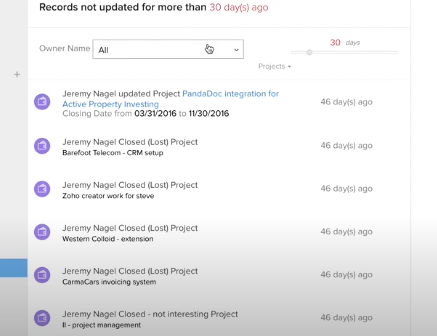
Here, we’ve got records that haven’t been touched in at least 30 days. Using the toggle on the top right, you can adjust the scope for how stale the record is. This is pretty handy.
What if you want to make it a little bit more refined?
Setting Up A Follow-up Date Field
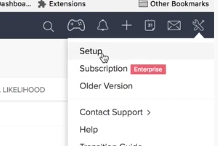
First, head over to set up in the top right:
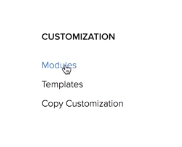
From there, go to Modules under Customization:
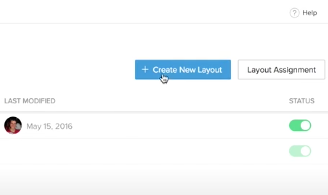
For this tutorial, we’re doing the accounts module. Once you click the module you want, select “+ Create New Layout”.
Now, we want to add a field for the follow-up date, so choose the date from the left.
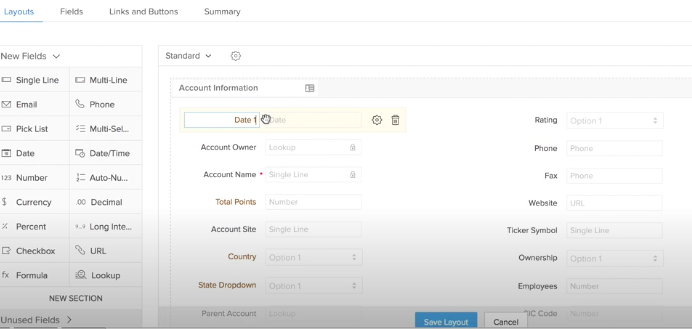
You can rename it “Follow-up date” and then click “Save Layout”.
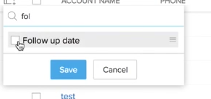
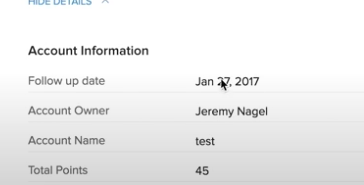
Now, head back to accounts, and choose your follow-up date:
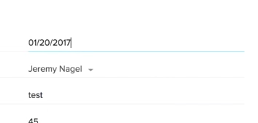
At this point, you can go into the account you want, and add the exact follow-up date on a calendar, like so:
Below, we’ve selected 3 more to all have the same follow-up date:

From here, click mass update and you’ll get the following screen:
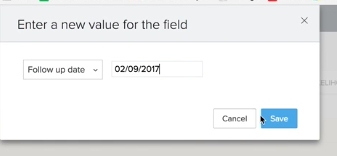
Set it to Follow-up date, choose the date you want, and you’ve just updated them all!
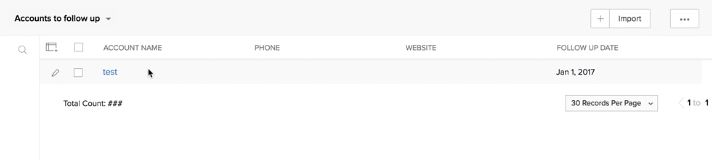
Next, you can click “Create View”, to get a view of which accounts to follow up. This will take you to this page:

In this example, we have Age in Days is greater than 0. We’ll expect to see none because all of the follow-up dates are set in the future. Also, be sure to make sure follow-up dates is in the “selected” column rather than the available one.
Here’s what it looks like when there’s a follow-up date in the past:
This is a practical way of doing it because it’s a bit easier than having tasks. It’s a better method if you’re worried about accidentally letting an account fall through the cracks, and is more convenient overall. It’s hard to report on accounts that don’t have a task.
Task Based Followups
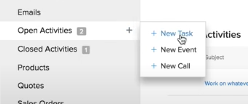
Another handy thing you might want to do is make it so that if you add an account with “follow up”, it’ll update the follow-up date based on that task.
Click “open activities” and then “new task”.
Imagine creating something like this:
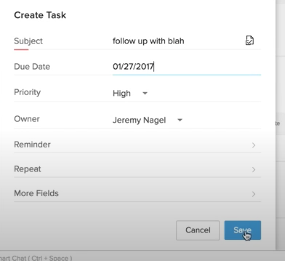
Wouldn’t it be great if that actually updated the follow-up date?
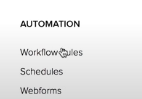
To do this, head into setup and then Automation > Workflow Rules:
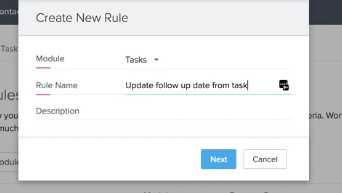
Click “+ Create Rule” .Make sure your new rule is in tasks. We recommend giving it the following name:
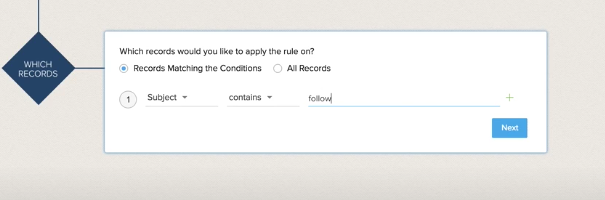
For the “when” part of the rule, select “on a record action”. In “which records”, make it so the task subject contains “follow”.
Under “instant actions” select “custom function” and then “write your own”. Input the following code:
account_record = zoho.crm.getRecordById("Accounts", account_id);
task_record = zoho.crm.getRecordById("Tasks", task_id);
update_payload = {
   "Follow_up_date": task_record.get("Due_Date");
};
update_resp = zoho.crm.updateRecord("Accounts", account_id, update_payload);
Now, let’s use the task we created before as a test. Select it under “open activities”. Next, copy the numbers in the URL. Put them into the edit arguments of your function:

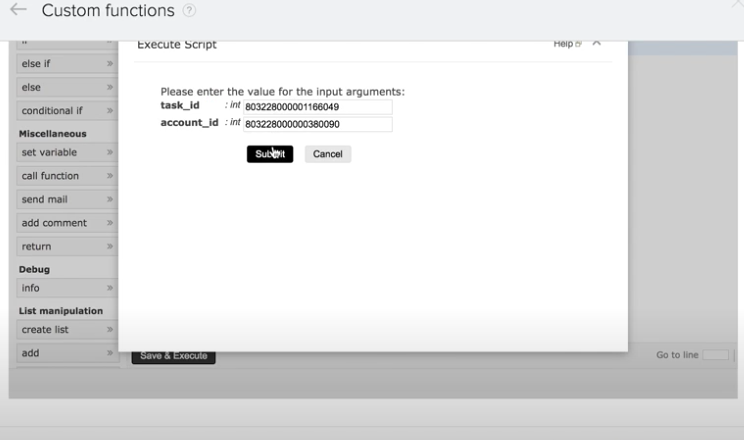
Paste it in along with your account id.
From there, try it out by submitting it.
As you can see, that follow-up date has been replaced with the new date! We hope this tutorial helped you.