
For this tutorial in video form, click here.
In this article, we’ll show you how to make a Zoho creator form that will update a lead in the CRM. Plus, we’ll be going over URL parameters in Zoho Creator forms which will allow you to send out an SMS link for your prospects and customers to fill out. The URL parameters trick is really neat because it means your prospect/customer doesn’t have to fill out information that they’ve already given you in the past.
For the purposes of this article, we’ll set up a simple form with a few fields.

First, head over to Zoho creator and click “Create from scratch”. We’ll title this one “Example Lead Update”.
After this, you’ll be prompted to create a form. Choose to create it from scratch. You can name the form something like “Update Contact Details”.
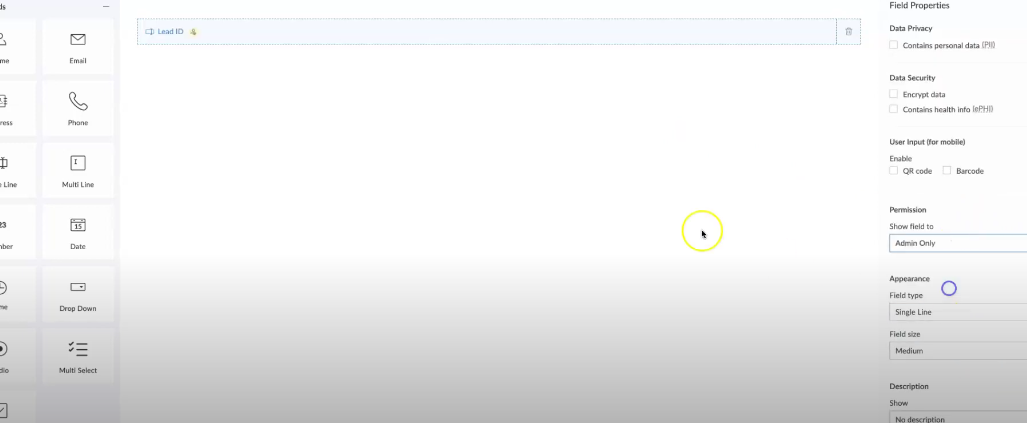
After that, drop in a single line field called Lead ID and update the permissions from “Everyone” to “Admin Only”. This means that your customer won’t see the field but it can still be populated from URL parameters (more about that later).
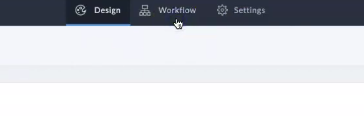
At this point, you’ll want to continue adding single-line fields for the questions. You might want fields like “First Name”, or “What products are you interested in?” (Note: for specific product choices you’ll probably want to use “drop-down” rather than single line so that you get consistent answers). Once you’re done adding fields, click “done” in the top right corner. At this point, you’ve made the form and it’s time to set up some workflows. You should see this option at the top of your screen, between “design” and “settings”.
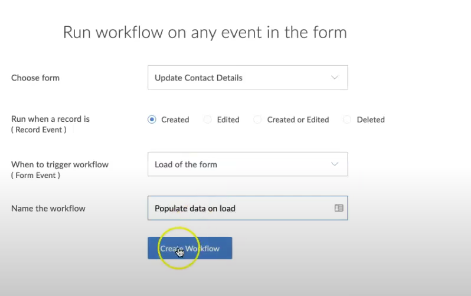
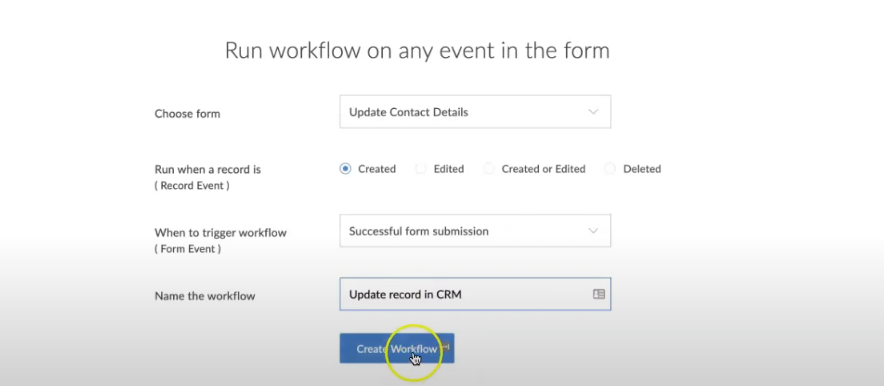
Next, create a workflow as per the screenshot below, and click “create”:
Now, you’ll be prompted to “Add new action”. Go ahead and click that and then choose “deluge script”. Then, you’re going to enter the following code:
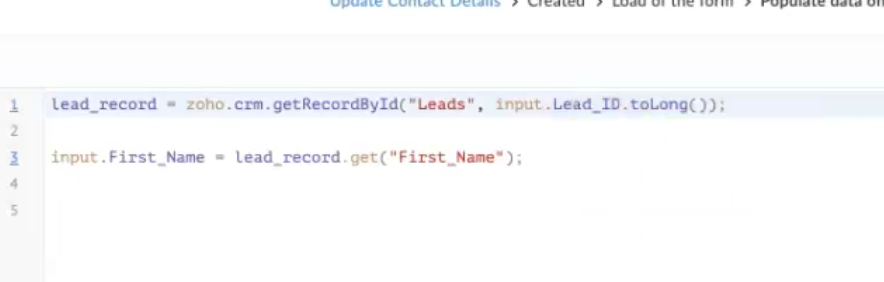
This will depend on the fields you’ve chosen. In our example, we want the first names to update, so we’ve done a line for first names. If you have other fields you want to pre-fill you can add appropriate code. When you’re done, save it and then create another workflow to automatically update the lead, like below:
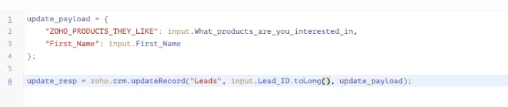
Upon completion of this step, go to the Deluge script field as you did in the previous workflow. Then update it with the following code. In our example, the API name is “ZOHO_PRODUCTS_THEY_LIKE”, but you’ll need to update it with the relevant API name for your CRM fields.
Once you’ve done this, click “done” and you’re good to go. If you want to do a quick test, select “access this application”, and use the ID of a lead you want to test with. Add Lead_Id=223424234234 (the lead’s ID) at the end of the URL. The test link should look something like the following:

As soon as you load the URL, it should automatically populate the first name (and any other fields you chose) in the form. This saves your prospects/customers time 🙂
When you save the form, you should find that the record in the CRM automatically gets updated.
Adding Into An SMS Template
When you’re happy, you can take the URL for the form, and put it into a URL shortener. We recommend tinyurl.com
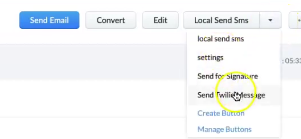
Next, head over to your prospects dashboard and choose a lead to experiment with. Click the Twilio message button.
After it loads, click Add Template (or Edit Template).
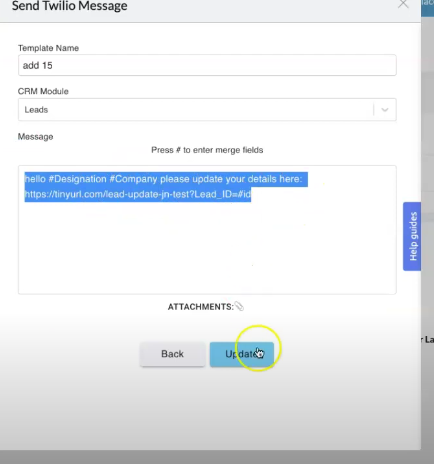
Put in a relevant message and include the link to your form with #id at the end so that the lead ID will get populated. Your template should look something like this:
With that template, your SMS will include a link people can click to update their details.
Sending out the message via a workflow rule
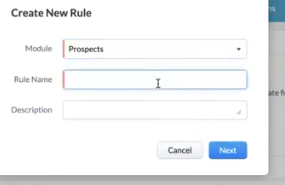
You can also do the same thing in a workflow rule. Head over to Setup. On the left, click “automation” and “workflow rules”. Here you can name the rule, and select the leads module (we’ve called ours “prospects” below):
Upon being asked about when to execute the rule, click “On a record action” and then “create”. After that, you can choose which prospects to apply the rule to. We’ve selected only the ones where their first name contains a word, for tutorial purposes. Feel free to play around with the conditions of this for certain demographics and prospects.
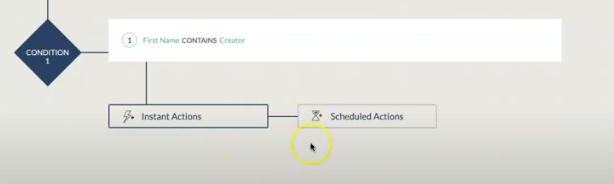
Under Instant Actions, choose Create Record. It will ask you for a record type. Click Twilio SMS messages, and you’ll be taken to the following screen:
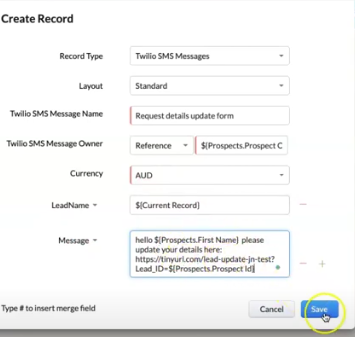
Fill out the following fields:
Twilio SMS Message Name: enter a helpful name
Owner: Choose Reference and select Lead Owner
LeadName: type # and choose Current Record
Message: Enter a relevant message including a link to the form URL with the lead ID at the end.
Click Save and you’re good to go with your new workflow SMS.
Conclusion
As you can see Zoho allows you to get leads to update their info for you by sending them a form. You can even text it to them! We hope this article gives you a solid idea of how to use Zoho to automatically update lead data.